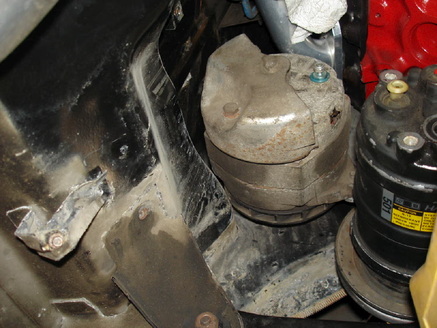
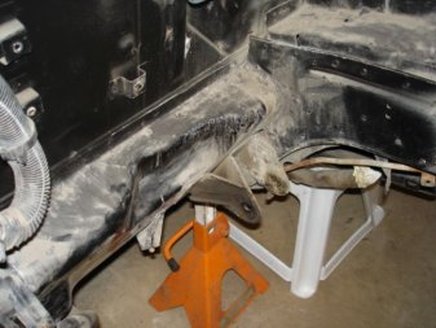
The engine is back in the car for another test fitting. What I noticed right away is that the alternator interferes with part of the firewall. This is looking up at the back of the alternator. The black bulge very close to it is a part of the firewall, and the pulley is actually touching it. The problem is that to tighten the drive belt, the alternator has to swing out (forward, towards the firewall - left in this picture); obviously it can't do that at all. So next time the engine comes out I'll have to do some cutting/welding in this area. Not sure why it is so close. If I moved the engine back on the cradle, then the rear exhaust header would interfere with the trunk. I don't think this will be a major problem to fix.
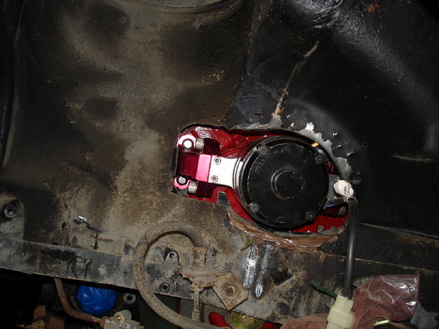
This shows the hole I cut in the fenderwell for the electric water pump to stick through. The engine is installed without it, and then the pump is installed onto the engine through this opening. I have to tidy up the edges a little and paint them; maybe make a cover at some point.
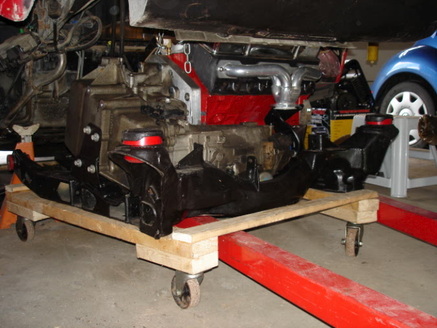
The engine came back out so I could fix up the area where the alternator was hitting the firewall. If you are going to make a dolly to put the engine on, or buy one, make sure it will go over the legs of the engine hoist; this will save you a lot of headache. Otherwise you lower the engine down onto the dolly, and it is sitting on the legs of the hoist. Then you can't move the hoist out of the way and it is a royal PIA.
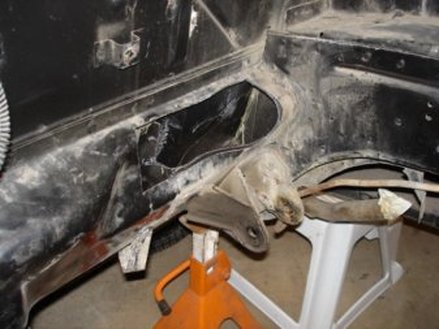
These pictures show the area I cut out to clear the alternator, before and after. Part of it was a double wall, and it was fairly thick. Makes sense since this carries the loads from the front cradle mount, just below it. I put the engine back in briefly to make sure the alternator cleared, before I weld new metal in. It cleared nicely. I actually cut out more than I had to, but I'll reinforce it with new metal to make sure it is at least as strong as it was.
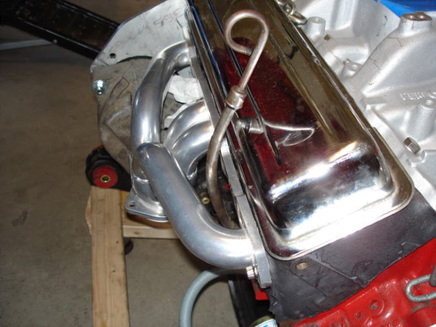
While the engine was out I tried fitting the oil dipstick tube in and found that it was fouling with the header tube. It needed a little more of a bend near the bottom, and then it cleared OK. It looks like it is hitting the flange, but it is clear of that too. This might be a little awkward to get at, since it is at the front of the engine, up against the firewall. I'll see the next time the engine is in how accessible it is. I think it will be OK. This is the older style of dipstick that goes in the block. There is a newer style that goes in the oil pan and it is on the other side of the engine. Might give better access with that style, but I'll see if I can use what I have.
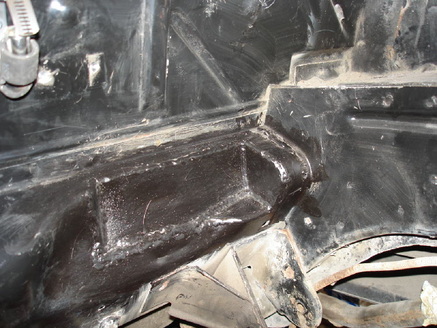
This is the part that was cut out to clear the alternator. New metal has been welded in and painted. It clears the alternator and the thicker metal welded in should make it as strong as it was before the area was modified.
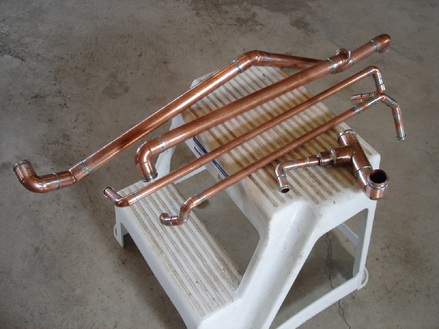
No, I haven't given up on the project and taken up plumbing......yet. These are the water pipes that I made. I suppose I could have run rubber hose from the connection points to the engine, but I wanted metal lines for as much of the run as possible. Some of these are close to the exhaust and other components and the metal lines look better and are more secure. I'll just use rubber hose to connect the end points of these lines to the engine and factory hose ends in the car. I debated different ways of making these and thought that copper plumbing pipe would be the easiest and should do the job (after all, radiators used to be soldered copper and that seemed to work well). The large pipes (1" copper) are almost the same diameter as the factory lines that run from the radiator, down the sides of the car, to the engine compartment. These connect from the radiator to the electric water pump inlet, and from the engine outlet back to the rad. The smaller diameter ones (1/2" copper) connect the heater lines in the center of the firewall to the front of the engine. The piece with 3 ends connects the radiator to the water pump and also the heater return line into the pump. I'll clean them up and paint them black so they won't look so much like household plumbing.
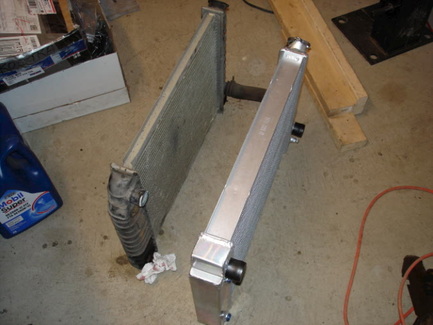
And what good are pipes without a nice new radiator to hook up to? This is the old radiator from the 4 cylinder car and the new one that is going in; quite a difference. It does fit with a little trimming of the rubber mounting points.
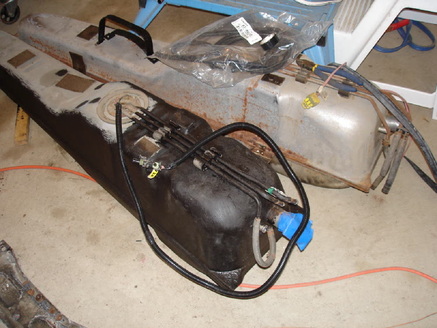
The fuel tank with the black paint is the one from the white Fiero, that is going in this car. The other one is the tank that came out of this car; it has a small leak and the fuel pump (in the tank) is from a 4 cylinder car. The tank from the white Fiero has a 6 cylinder fuel pump in it which should be suitable for the V8. Since the V8 is carburetted it doesn't need high fuel pressure, so a pressure regulator will be used to step it down and return the excess fuel to the tank. The wiring harness was different for the 2 tanks/pumps, so I swapped the Dinero harness onto the white Fiero tank. I even found some split-loom left over from another project that was the right size to cover up the wires and give that factory look.
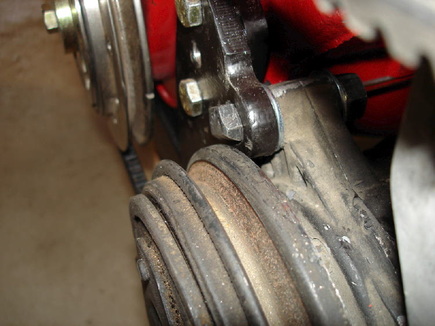
The alternator and A/C compressor have been mounted (hopefully for good now) on the engine. In order to get the pulleys to line up, and with the A/C compressor I had, the mounting bolts were interfering with the A/C drive pulley. I ground the heads of the 2 mounting bolts to just clear the pulley. I considered taking the pulley off and spacing it farther forward to clear the mounting bolts (and then spacing the unit back a bit), but it is not an easy job with these compressors to remove the pulley, so this was easier and should be secure enough. For now I probably won't bother with hooking up the A/C lines, so the compressor pulley will just be turning with the belt without any load. Once the car is all sorted out I'll see about getting the A/C working. Since my wife says this is going to be her car, it will have to have working A/C....I guess as long as it is not working it is still my car.
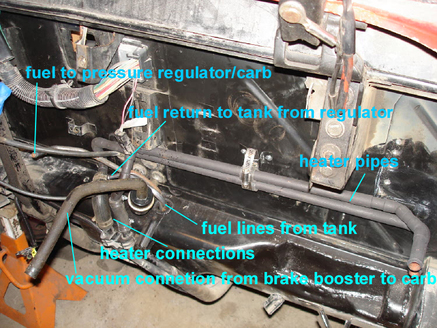
There is a lot going on in this picture, so I thought I'd label it. The 2 heater lines are the 1/2" copper ones I made, now painted black. They connect to the lines in the car coming from the heater. The fuel lines I brought from the tank out through a hole into an area that is, hopefully, convenient to the regulator/carb area. This made things pretty congested in this area, so I'm not sure it was a good idea. Also, the connections up under the car to the tank are pretty hard to get at; if they leak I may be pulling them out and running them a different way.There are also 2 cables coming out of the same area, one is the throttle cable and the other is the tranny shifter.
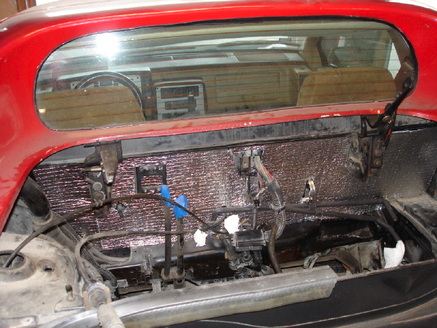
I've added some insulation to replace the factory black stuff that I took off (since it was pretty dirty and disgusting). This is just cut and fit, not glued on yet. It should help keep the noise down in the car and will also help prevent heat from the forward header from heating up the firewall sheet metal (and transmitting that heat into the car). I'll put 2 layers here since each layer is only .25" thick and it is pretty easy to work with. The engine has been in and out several more times while fitting the fuel and heater tubes to make sure they don't interfere with anything (like hot headers).